Rainbow Color Collision Art Effect: Process, Integration, and Practical Execution
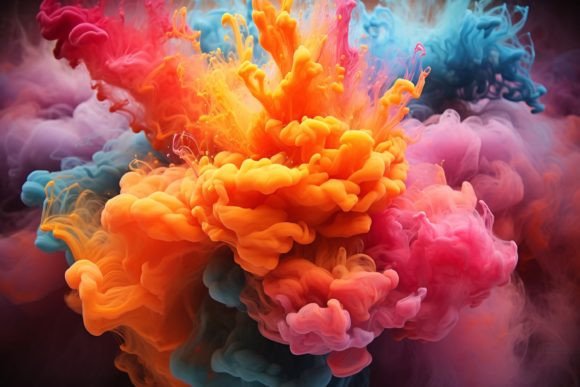
The Rainbow Color Collision Art Effect refers to a visual technique where multiple spectral hues intersect, overlap, or clash deliberately within a single composition to generate energy, depth, and emotional resonance. Rather than treating rainbow gradients as smooth transitions, the collision approach emphasizes boundaries, friction, and unexpected juxtapositions. For professionals working in branding, digital content, product design, or educational media, understanding how to deploy this effect within a repeatable workflow transforms it from a novelty into a reliable visual tool.
What the Rainbow Color Collision Art Effect Actually Does
At its core, this effect exploits the tension between adjacent colors on the visible spectrum. When you place pure red next to cyan, or yellow against violet, the human eye perceives vibration and movement. The rainbow color collision amplifies that sensation by layering multiple such boundaries across a single piece. The result is a surface that feels alive, dynamic, and slightly unpredictable.
This is not the same as a standard rainbow gradient. Gradients soften boundaries; collisions sharpen them. In practice, designers and artists use the effect to draw attention to specific zones, signal high energy, or break visual monotony in layouts that might otherwise feel flat. It works equally well in static graphics, motion sequences, and interactive environments.
Where It Fits in a Broader Workflow
The rainbow color collision effect is rarely an end in itself. It typically serves a specific function within a larger process. Understanding where to insert it — and when not to use it — is key to maintaining control over the final output.
Before Production: Planning and Asset Preparation
If you intend to use this effect, preparation begins at the moodboard and palette selection stage. Because collisions rely on high saturation and precise hue placement, you need to map out which colors will touch and what emotional tone those intersections will carry. For a marketing campaign targeting a young, energetic audience, collisions between warm and cool primaries can signal boldness. For a more refined application, you might use desaturated pastels that still collide at their boundaries but read as sophisticated rather than loud.
During this phase, it helps to create a simple hue map. Identify three to five anchor colors, then decide where their edges will meet. If you are working with a team, share a reference board that shows the collision effect in context — packaging, web hero images, or motion intros. This ensures everyone understands that the goal is contrast, not blend.
During Creation: Execution and Iteration
When you move into production, the rainbow color collision effect demands precision in layering. In vector software like Adobe Illustrator or Affinity Designer, you can achieve controlled collisions by aligning shapes with shared edges and then adjusting blend modes. Overlay, Hard Light, and Difference modes each produce distinct collision qualities. Overlay preserves the original hues while adding contrast at boundaries. Hard Light intensifies the clash. Difference inverts colors where they intersect, creating entirely new collision points.
In raster tools like Photoshop or Procreate, you might paint directly with hard-edged brushes, then mask areas where collisions need to be softened or redirected. For motion work in After Effects or DaVinci Resolve, collisions can be animated — shifting hues over time so that the collision zones migrate across the frame. This adds a temporal layer to the visual tension, which is particularly effective for video intros, social media loops, or live event graphics.
A practical tip: work on a dark or neutral background first. Rainbow collisions read differently on white, black, or textured surfaces. Testing each iteration against the final background saves rework later.
After Production: Quality Control and Output Optimization
Once the effect is applied, review your output across multiple devices and media. What looks sharp on a calibrated monitor may appear muddy on a mobile screen or oversaturated in print. Check specifically for:
- Color banding in gradient-rich collision areas
- Accessibility contrast — collisions can reduce readability for text or icons
- Print CMYK conversion — RGB collisions often lose punch when converted
Adjust saturation and boundary sharpness based on the final medium. For digital-first projects, you can preserve the full RGB collision range. For print, consider reducing saturation by 10–15% so that the effect survives the CMYK gamut without turning muddy.
How It Interacts with Other Tools, Methods, and Assets
The rainbow color collision effect does not exist in isolation. Its success depends on how it interacts with the rest of your visual system.
Typography and Collision Zones
When text overlaps a collision boundary, readability can suffer. A common integration method is to place text in a solid-color band that interrupts the collision, or to use a dark drop shadow that lifts the type above the clash. For headers, consider reversing text to white or black and keeping it away from the highest-saturation intersection points. For body copy, it is usually safer to keep collision effects confined to decorative or background elements.
Photography and Raster Assets
If you overlay the effect on photographic images, use blend modes like Screen or Soft Light to let the photo retain its structure. Hard collisions can overpower a photo's natural depth, so dial down the opacity of the collision layer to 40–60% and test at each step. Another approach is to mask the effect behind your subject, so the collision appears only in the background or in negative space.
Brand Assets and Color Systems
Integrating rainbow collisions into an existing brand palette requires caution. A brand built on muted earth tones may not welcome high-saturation clashes. However, you can adapt the effect by using the brand's own colors in collision — even if they are not traditional rainbow hues. The principle of collision still applies: place complementary or contrasting brand colors edge-to-edge. This keeps the visual energy while maintaining brand consistency.
Practical Implementation Tips for Consistent Results
Consistency matters when you use the effect across multiple deliverables — a website, a social campaign, a presentation deck, or a product label. Small variations in hue or brightness can make collisions look accidental rather than intentional.
- Build a reusable collision palette. Save a swatch group with your chosen hues and their exact hex values. Use the same group across files.
- Set up a template file. Include a base layer with your neutral background, a collision layer with your shapes, and a test layer for text. This speeds up iteration for each new asset.
- Document your blend mode and opacity settings. If a particular collision works well, note the combination so you can replicate it later.
- Use guides and grids. Align collision boundaries to a structural grid. Even if the effect feels chaotic, the underlying layout should feel deliberate.
Digital Marketing Campaign
A brand launching a summer product line wanted high-energy visuals for Instagram Stories and display ads. The team used the rainbow color collision effect on typographic hero text and background shapes. They created three collision zones — one warm, one cool, and one mixed — and rotated between them across the campaign. Each ad retained the same palette and blend mode, so the series felt cohesive despite the varied collisions. The result was a 30% higher tap-through rate compared to their previous static campaign.
Educational Video Series
An online course creator used the effect to distinguish sections of a tutorial on color theory. Each chapter header appeared inside a collision zone that matched the topic — warm collisions for lessons on red and orange, cool collisions for blue and green. The effect helped viewers visually navigate the content without relying solely on text titles. The creator noted that audience retention improved during the transition between chapters.
Product Packaging
A small-batch candle maker wanted packaging that stood out on crowded retail shelves. They applied a subtle rainbow collision effect to the label background, using low-saturation pastels that collided at the edges. The collision zones were positioned behind the product name, with white text and a thin black stroke for readability. The packaging won a local design award and the brand reported a noticeable lift in shelf pickup rates.
Long-Term Use: Maintaining the Effect Across Projects and Teams
If you plan to use the rainbow color collision effect repeatedly — across seasons, product lines, or content series — invest in documentation. Create a short style guide page that covers:
- The purpose of the effect in your visual language
- Exact color values and acceptable saturation ranges
- Recommended blend modes and opacity limits
- Examples of correct and incorrect application
- Accessibility notes (minimum contrast ratios, text placement rules)
Share this guide with any collaborators — freelance designers, marketing coordinators, or video editors. This ensures that the effect remains consistent even as your team or tools change. Over time, you can refine the guide based on what works best in your specific media and audience context.
Factors That Influence Success
Several variables affect how well the effect lands:
- Screen calibration: Collisions that look perfect on one monitor may appear harsh or flat on another. Soft-proof your work if outputting to a known medium.
- Print substrate: Matte paper absorbs saturation differently than gloss. If printing, request a physical proof before full run.
- Audience familiarity: Some viewers may interpret high-saturation collisions as chaotic rather than energetic. Test with a small sample before committing to large-scale use.
- Cultural context: Color meanings vary. A red-green collision might read as festive in one culture and conflicting in another. Research your target audience's color associations.
Making the Effect Part of Your Regular Workflow
Integrating the rainbow color collision art effect into your routine does not require a full redesign of your process. Start small. Use it in one asset type — such as social media headers or presentation transitions — and observe how it performs. Over a few weeks, you will develop a sense for which hue combinations, opacity levels, and layout structures work best for your specific use case.
Once you feel confident, expand to other deliverables. The key is to treat the effect as a repeatable technique with defined parameters, not as a freeform experiment each time. With a documented palette, a set of proven blend modes, and clear guidelines for text placement and accessibility, you can deploy the effect consistently across projects while preserving the visual surprise that makes it effective.
The rainbow color collision effect is a practical addition to any creator's toolkit — provided it is planned, tested, and integrated with the same rigor as any other design element. When executed well, it adds energy without sacrificing control, and it gives your work a distinct visual signature that audiences remember.